> For the complete documentation index, see [llms.txt](https://documentation.civalgo.com/llms.txt). Markdown versions of documentation pages are available by appending `.md` to page URLs; this page is available as [Markdown](https://documentation.civalgo.com/documentation/resources/create-an-employee.md).
# Create an employee
Learn how to create or import employees into your organization. This is a required step to assign them to schedules or projects in Civalgo - whether or not they will be invited to use the platform.
### Prerequisites
[Create an organization](https://civalgo.gitbook.io/civalgo-docs/~/revisions/98zVhYBZyyDaVmVhbs86/documentation/resources/create-an-organization)
### Create a new employee
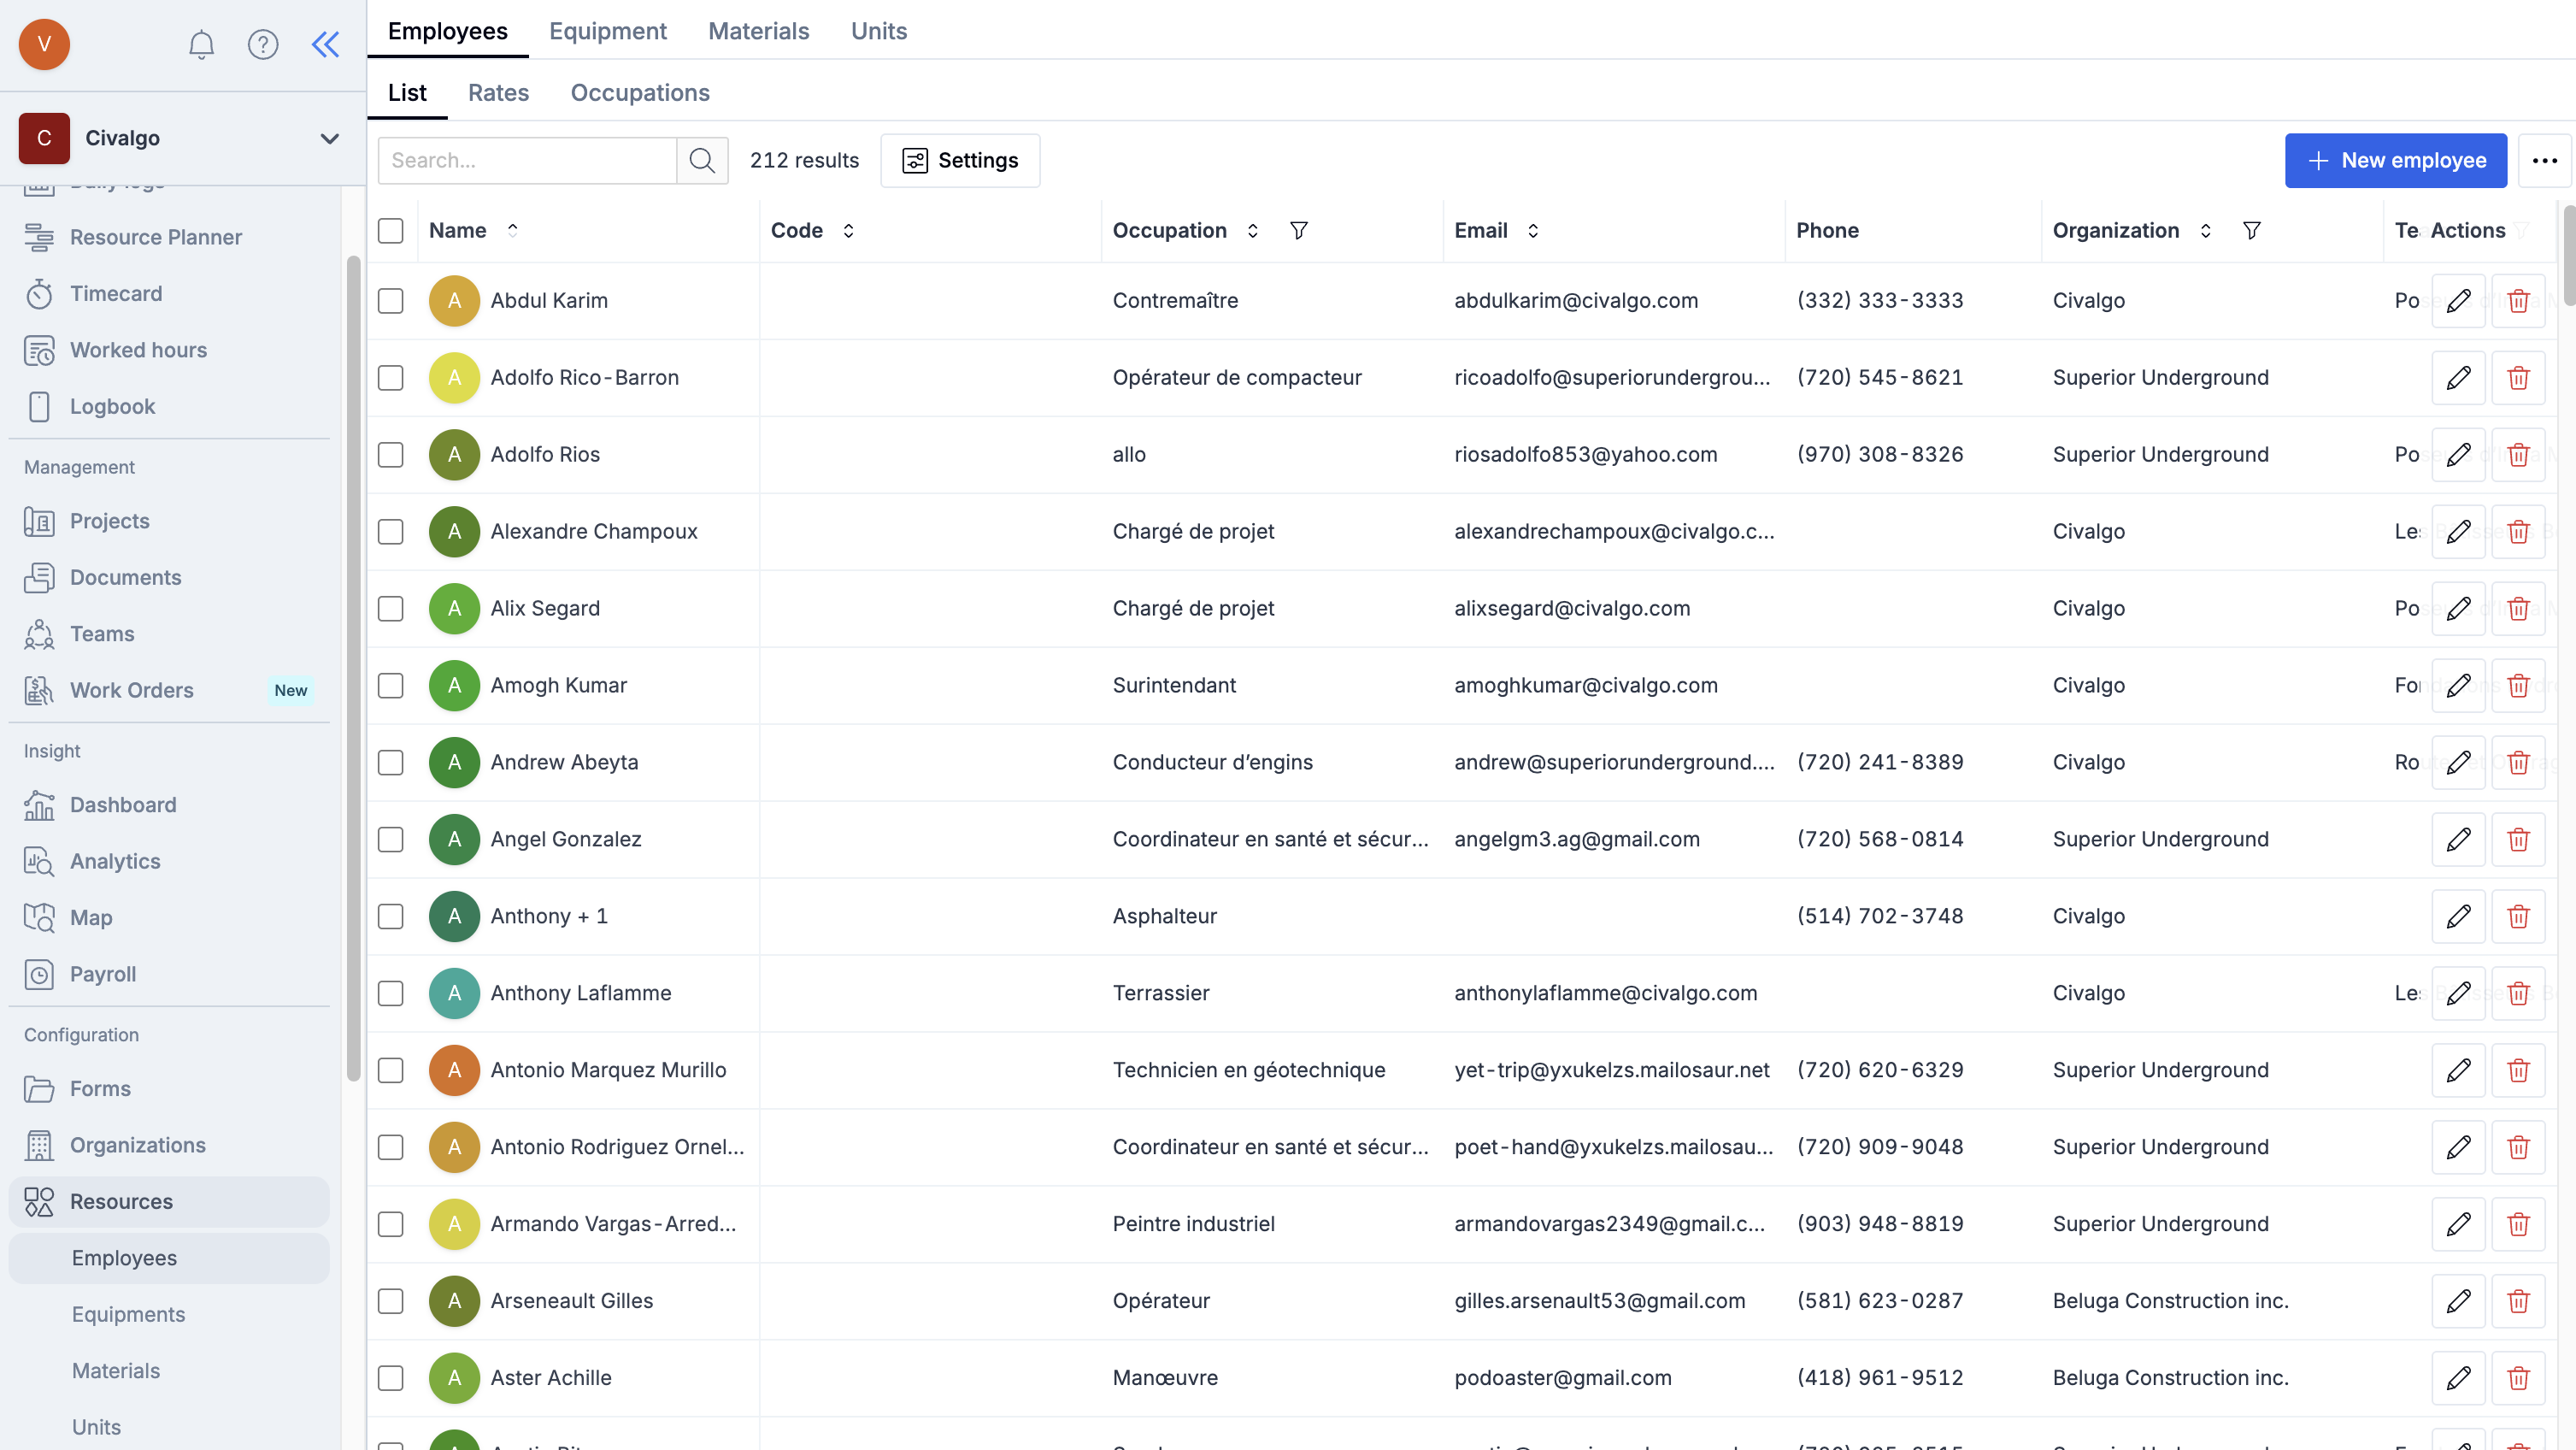
#### Step 1 – Go to the Employees page
Click on **New Employee** (top right) to start.
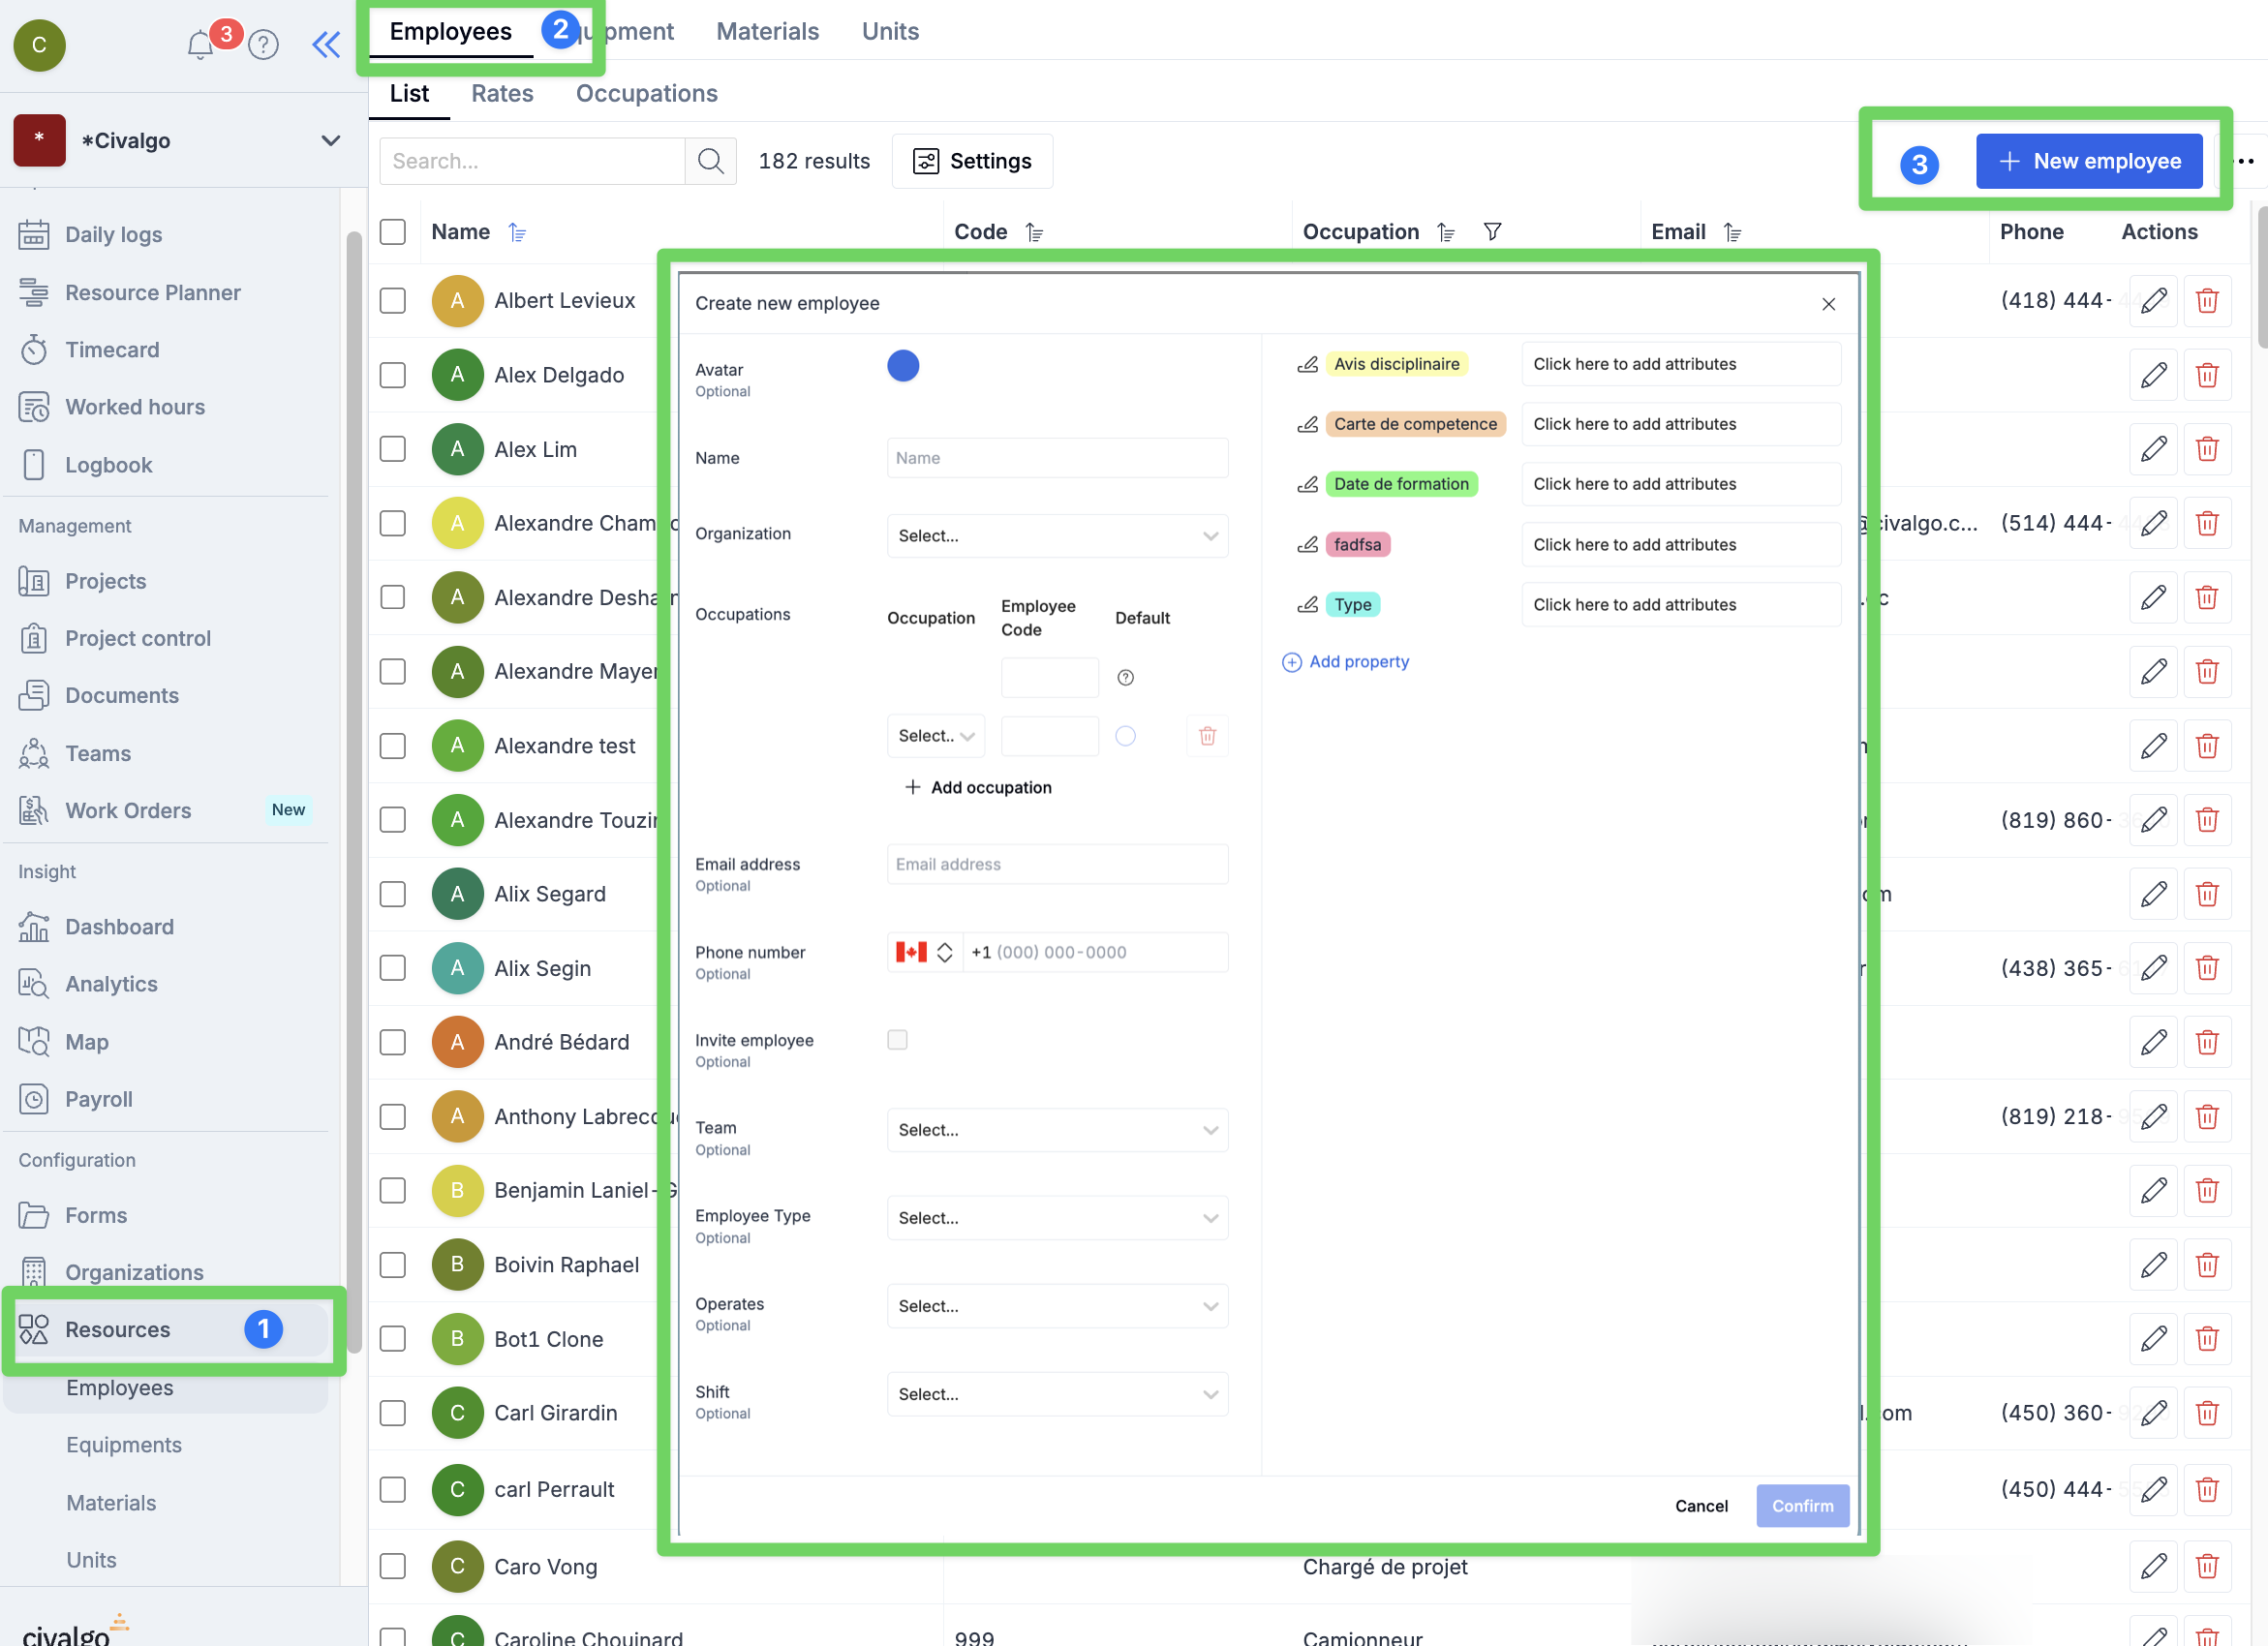
#### Step 2 – Fill in the employee information
* **Name**: Used to identify the employee when selecting them from a list.
* **Code (*****optional*****)**: A unique internal ID for the employee.
* **Occupation**: Used to automatically assign costs based on the employee’s occupation.
* **Email Address (*****optional*****)**: Needed if you want to invite this person as a platform user
* **Phone Number (*****optional*****)**: Needed if you want to invite this person as a platform user. Also enables sending SMS messages to the employee.
* **Organization**: Used for cost tracking and to classify the employee as an internal or external resource.
* **Team (*****optional*****)**: Automatically assigns the employee to a daily log based on their team.
* **Operates (*****optional*****)**: Most commonly used equipment by this employee. Auto-added to daily logs when assigned.
* **Shift (*****optional*****)**: The employee’s default shift.
* If the team has a shift assigned, it will apply to all team members by default in the daily log.
* However, if the employee always works a different shift (regardless of the project), you can define it here — it will be auto-assigned whenever they’re added to a daily log.
* **Properties (*****optional*****)**: Custom fields to store extra employee details
#### Step 3 – Click Confirm to save
### Import Multiple Employees
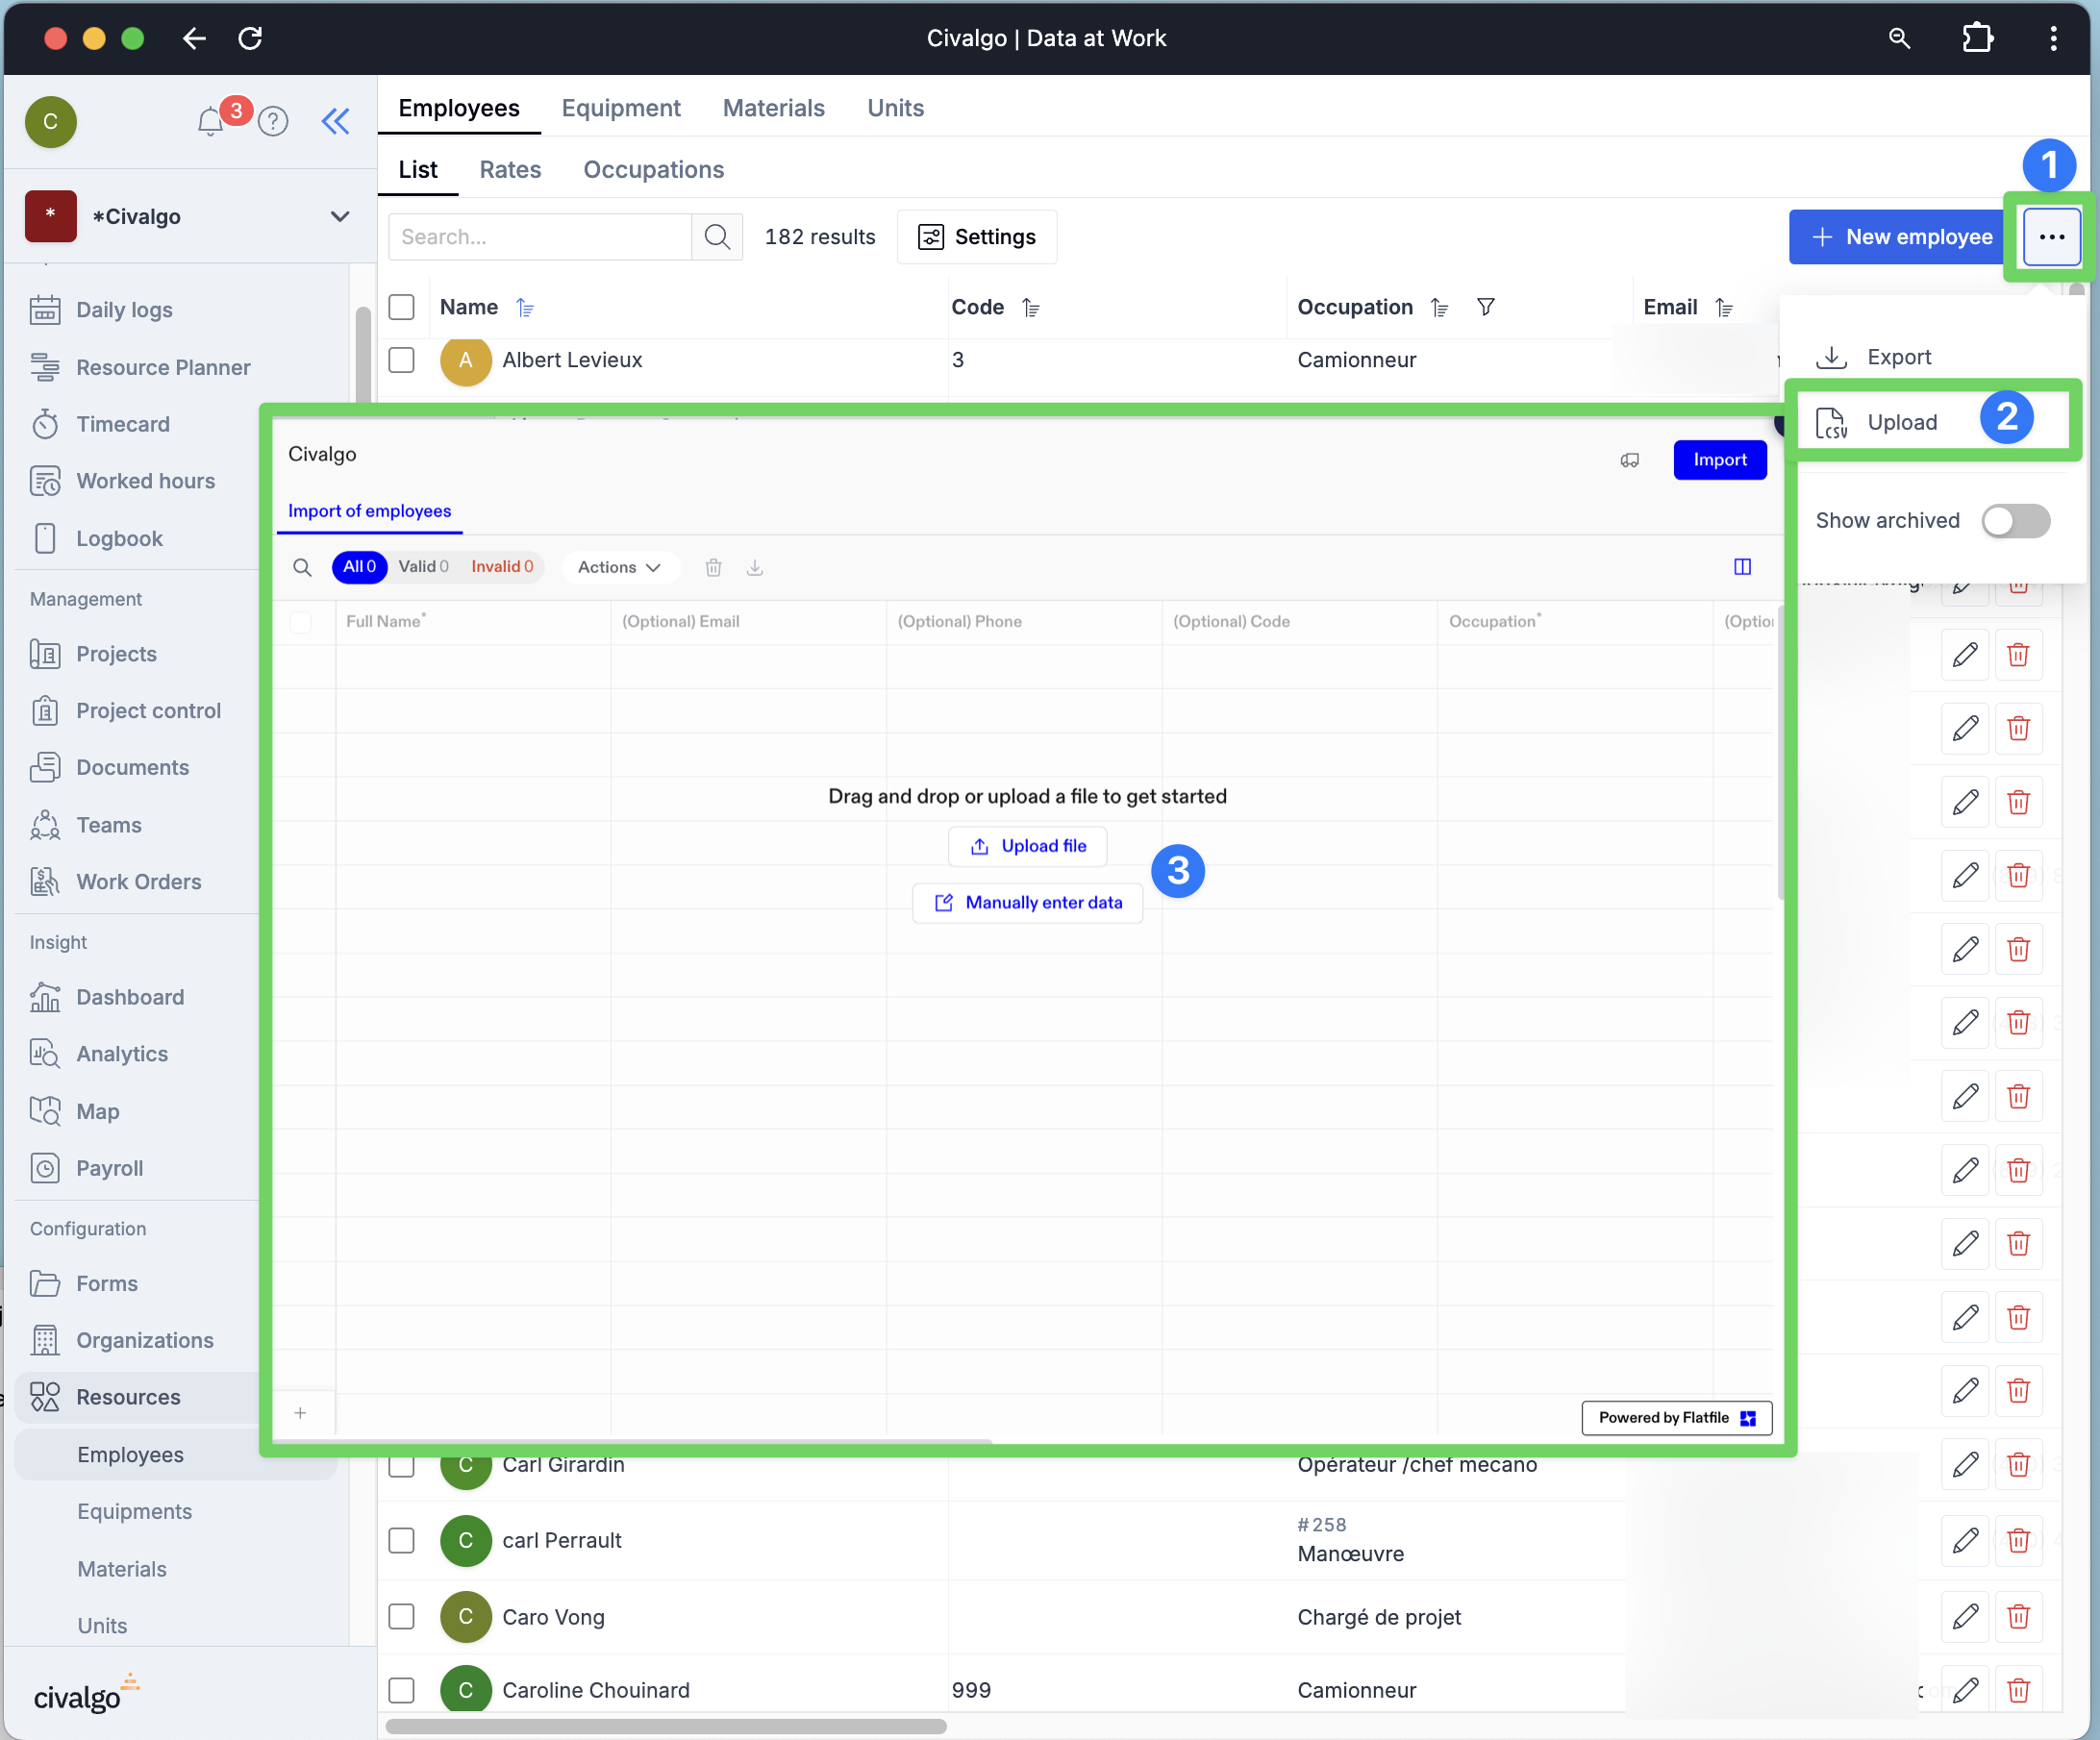
#### Step 1 – Go to the Employees page
Click the **Options** button (top right), then select **Import**
#### Step 2 – Upload or paste employee data
* **Upload a file** in **.CSV format**
* → You’ll be asked to match your file’s columns with the system’s fields
* Or, **paste data manually** from Excel using the same column structure
#### Step 3 – Review & import
* Fix any errors flagged during validation
* Click **Import** to add your employees
---
# Agent Instructions
This documentation is published with GitBook. GitBook is the documentation platform designed so that both humans and AI agents can read, navigate, and reason over technical content effectively. Learn more at gitbook.com.
## Querying This Documentation
If you need additional information that is not directly available in this page, you can query the documentation dynamically by asking a question.
Perform an HTTP GET request on the current page URL with the `ask` query parameter:
```
GET https://documentation.civalgo.com/documentation/resources/create-an-employee.md?ask=
```
The question should be specific, self-contained, and written in natural language.
The response will contain a direct answer to the question and relevant excerpts and sources from the documentation.
Use this mechanism when the answer is not explicitly present in the current page, you need clarification or additional context, or you want to retrieve related documentation sections.